Joyfully Prudent

prudent living - simple solutions - joyful journey

  • Bloglovin
  • Email
  • Facebook
  • Instagram
  • Pinterest
  • RSS
  • HOME
  • ABOUT
  • FINANCE
    • Budget
    • Money Saving Tips
  • LIFESTYLE
    • Our Home
    • Projects
    • Organization
    • Parties/Entertain
      • Birthdays
    • Motherhood
      • Pregnancy
      • Letters to Beckham
      • Letters to Maddox
    • Our Life
      • Life Lately
      • Day in my Life Posts
    • Goals
      • 2015 Goals
      • 2016 Goals
  • FOOD
    • RECIPES
    • Groceries
    • Toddler Meal Ideas
  • SHOP
    • T-Shirts & Mugs Etsy Shop
    • Printables Etsy Shop
    • 15% Discount on Shirts
  • CONTACT & DISCLOSURE

February 2, 2014 by: JoyfullyPrudent

DVD Organization

Checked another 2014 Organizing Project off my list.  This one was simple and has considerably saved a ton of room.  I decided to take our DVD’s and organize them.  We have great shelves on the side of our entertainment center to hold our DVD’s, but there had to be 2 stacks (one in front of the other) and since we’re accumulating more Children DVD’s, we needed more room.

I researched, via Pinterest, many ways to organize DVD’s, and THIS ONE looked most comparable to our needs.  I used different DVD cases.  Here’s what I did.
Took out all the DVD’s we owned, not including TV series.  This was most of them (not including kids).
Empty.  Dusted 🙂
Knew I needed about 60-70 cases, so I bought 2 packages of these color DVD cases. 
Took the cover and DVD out of original case.  Cut the cover to fit new case and slipped the DVD inside.  The front (last picture on right) will face the front and when I turn it over, I can still see the front of the actual DVD.  Note: If the DVD itself had a really great image similar to the cover, I simply tucked the DVD inside the new case and had it face the front.
Then came the fun part.  I cut 19 pieces of white cardstock to fit as dividers.  I decided to organize DVD’s alphabetically (3 letters at a time) into two different categories – ADULT and KIDS.  Our kid selection is very low right now, but I know that will get very big.  I also have a “Christmas Movies” section.  I can always add another section if needed.  I used washi tape to distinguish Adult vs. Kids.  Then I used my label maker with clear background to label each divider.  Lastly, I went to the teacher store and got them laminated.  Costs .50/foot so it was definitely affordable vs. doing it myself.


Then I just organized them alphabetically.  For example, behind this “Adult ABC” you’ll find movies like Air Force One.


Placed them back in the cabinets.  All those DVD’s don’t even take up an entire shelf! 


We still have our TV series DVD’s on the right side.  We are selling the House, Criminal Minds, and Grey’s Anatomy seasons so that will free up another two shelves.  I have kept the Star Wars collection (all my hubby), a few empty DVD cases (for traveling), and the extra DVD cases in the upper left shelf above all the DVD’s. 
See how there are DVD’s in the back?  Couldn’t ever really see them.
Love it!  Cases were about $6.00 each. Washi tape (3 colors) was about $3.00.  Storage container found at Container Store was about $7.00. And laminating was about $2.00.  Total cost of project = $24.00.  Considering I only had the white card stock, I’d say that was pretty good. 

*We also took the old TV out of the armoire in our bedroom and replaced it with the new TV Ryan bought a while back.  Thank you to my dad and brother who helped move it!  So that was another project crossed off the list.  I don’t have a picture of it though.

2014 ORGANIZING PROJECTS:
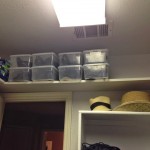
-Organize master closet
-Sell items in guest room or find storage space for keepers
-Organize garage (create spaces in garage dedicated to needed storage/uses)
-Organize files in filing cabinet
-Put manuals/warranties in organized binder
-Buy buffet table for dining room and utilize more storage (hoping the hubby agrees)
-Organize DVD’s into sleeves for more storage space in entertainment center
-Clear out guest room

-Clear out guest closest
-Clear out/organize dressers in room
-Take old TV out of master bedroom and put in new TV -Make photo books (Beckham 1 & 2 years, Honeymoon, Pregnancy #1)
-Organize Beckham’s closet/clothes (put in garage once there is space)
-Put a new storage shelf (IKEA) and tall armoire in playroom for toy storage
-Hang wreath (sounds easy, but I had to create a hanger for it since it didn’t have one
-Refinish/stain front door
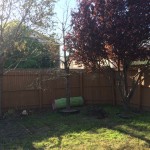
-Buy outdoor furniture for backyard and set up patio (possibly a fire pit)

Related Posts

  • 2014 Project List Update2014 Project List Update
  • Organized Pantry: Before and AfterOrganized Pantry: Before and After
  • Our Backyard Makeover (Mid-Makeover)Our Backyard Makeover (Mid-Makeover)
  • Nursery Tour…and Boy Room and PlayroomNursery Tour…and Boy Room and Playroom
  • My Master BedroomMy Master Bedroom
  • 5 on Friday – Organizing Organizing Organizing5 on Friday - Organizing Organizing Organizing
(Visited 369 times, 1 visits today)
Getting Groceries Under Control – Part 1: The Plan (February Series)
Getting Groceries Under Control Part 2: Week 1 Meals and Shopping

Leave a Reply Cancel reply

Your email address will not be published. Required fields are marked *

The Kiddos

The Kiddos

Instagram @oliviacsnyder

Load More...
Follow on Instagram

Pinterest

MY GRAPHIC TEES SHOP - CLICK PICTURE

MY GRAPHIC TEES SHOP – CLICK PICTURE

Fall Coffee Mugs

Fall Coffee Mugs

Search

Labels

Archive

Popular Posts

  • Feeding a Toddler: TONS of Meal Ideas and Recipes
  • 5 Crucial Tips When Paying Off Debt
  • DIY: How to Make a Glitter Dipped Mug and Wine Glass
  • How To Make Stamped Books
  • 5 Tips for Living on One Income
  • 12 Days of Christmas Gifts
  • Top 4 Tips To Getting Rid of Debt!
  • Tips for Exclusively Pumping
  • Baked Ziti Recipe - Easy, Cheesy, & Yummy
  • 1st Birthday: Baseball Theme - Beckham Hits a HomeONE

© 2024 · Fun Genesis WordPress Theme by, Pretty Darn Cute Design