I made some Oreo balls for my sister-in-law’s baby shower and I wanted to share the recipe and how I decorated them. You could do this for any celebratory event.

Ingredients:
Package of Oreos
8oz. cream cheese (room temperature)
Chocolate Almond Bark
Vanilla Almond Bark (optional)
Directions:
1. Dump Oreos in a large plastic bag and crush them. Pour them into a large bowl.
2. Add the cream cheese to the Oreos and mix them together (I use a potato masher).
3. Put them into a blender or food processor and blend them until smooth. You can leave bits of crunch in them if you want, so don’t kill yourself over creaming them.
4. Form them into quarter sized balls (take your rings off…this gets messy) and lay them on a lined baking sheet (I use foil).
5. Poke sticks in the middle of them. I usually don’t do this, but it made dipping them SO much easier.

6. Let them set in the fridge so they harden. I did this overnight, but they should harden in 15-20 minutes if you’re in a hurry (I’ve done this before).
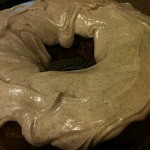
7. Melt your chocolate in the microwave (FOLLOW the directions). It’s best to microwave it 60 seconds initially and then every 15 seconds, stirring in between, until it becomes smooth.
 |
| I used Plymouth Pantry Almond Bark |
8. Dip Oreo balls in chocolate, covering all sides. Try and let the excess chocolate drip off.

9. Melt vanilla almond bark.
10. When it’s melted completely, add a couple drops of food coloring if you want it colored. I added red, so it would be pink (she’s having a GIRL). ***Now I will say that right when I started stirring the food coloring in, it started to clump. I almost freaked out, but just keep stirring quickly and it became smooth. I have no idea why, but it was all fine. Maybe I should have waited for it to cool…I have no idea.

11. Take a spoon and drizzle over the balls, trying not to touch the sticks. This is the “artsy” part. I would suggest practicing your drizzling on a paper plate before because my first few always look bad. The chocolate won’t just fall off, you kind of have to fling it gently back and forth.
 |
| Notice my first few are kind of clumpy |
 |
| All drizzled! |
12. I kept them out at room temperature since I was heading to the party, but you can also put them back in the fridge if you’re prepping ahead of time.
The Toppers:
I wanted to fancy these Oreo balls up a bit, so I decided to add cute tags with the baby girl’s name on it – Tenley Grace…how cute is that?! I’m going to have the cutest niece ever!
What You’ll Need: Scrapbook paper, Printing Paper/Printer, Scissors, Tape
How I Made Them: I made three columns of her name in different fonts (about 18 to a page) and used pink font. Printed two sheets out and cut them up. Then I cut strips of scrapbook paper. I taped the name onto the paper and folded it over and used more tape to the middle (just keep in mind you’ll be placing the folded part over sticks). Once they were taped, I cut the edges so they were all straight. Then just stick them over the sticks.

They were delicious! Some different variations you could do are:
-Dipping the Oreo balls in the colored vanilla almond bark instead of the chocolate, so you can have different colors.
-Add sprinkles or nuts – just make sure you add them right after you dip them because the chocolate dries pretty quickly.
-Halloween (orange and white drizzle topping, orange sprinkles)
-Christmas (green, red, and white chocolate with opposite colored drizzles/sprinkles)
-Keeping them the same as shown above, but using the tags to make a theme.
 |
| At the shower |


Leave a Reply